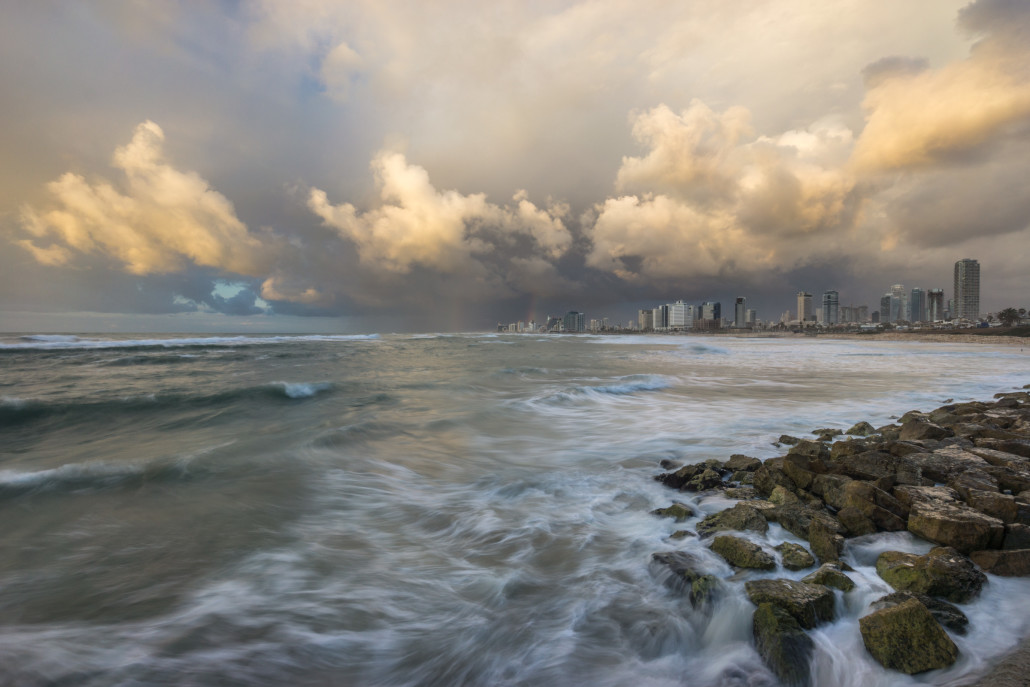
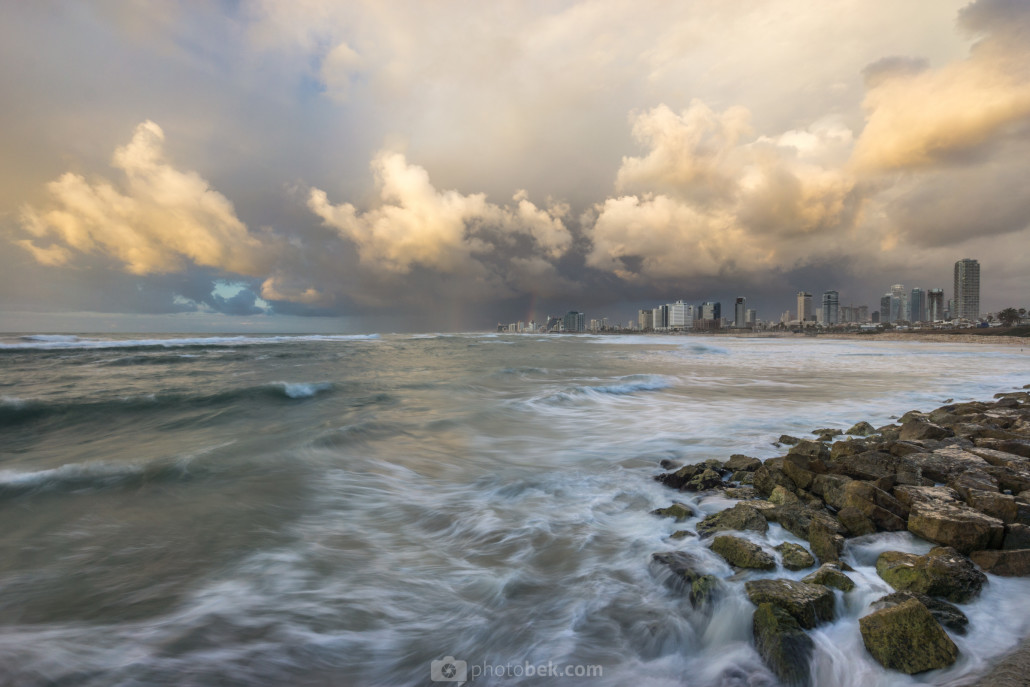
In this making of (the 1st of many more to come), I want to share the making of the “Winter is Here” image. It’s a photo of a storm over Tel Aviv, Israel, as shot from the city of Jaffa that overlooks the entire coastline of Tel Aviv.
Before The Shot
We don’t get too many winter days here in Israel, so even though I wouldn’t say I like the winter and I wouldn’t say I like the rain, I try to make the most of it by at least getting some good photos while I can, as the only good thing about winter is the great cloudscapes it brings along with it.
As I was sitting at the office, I noticed that the sky is filled with clouds, and according to the forecast, it seemed like it would stay that way and that some rain will be coming in the next hour or two. It was around 4 pm, and I knew that sunset would be around 5:30 pm, so I figured I’d pack my things and go out to get some shots.
I hopped on my bike and drove to a fairly new vantage point that I have no idea why I didn’t visit more often as it is straightforward to get. I practically parked my bike right on the sidewalk, and all the shots I took were no more than 5 meters from it.
The Shooting
When shooting water, I always try to shoot long exposure to get the fog and “smudge” effect on the water, so I have a 3 stop and a 10 stop ND filters.
I took out my tripod, attached my camera, and started shooting. I added my 3 stop ND filter and tested different exposure times to see what works best with the water and clouds. Usually, 1-2 seconds won’t have a big impact on clouds, but it will greatly impact water and waves.
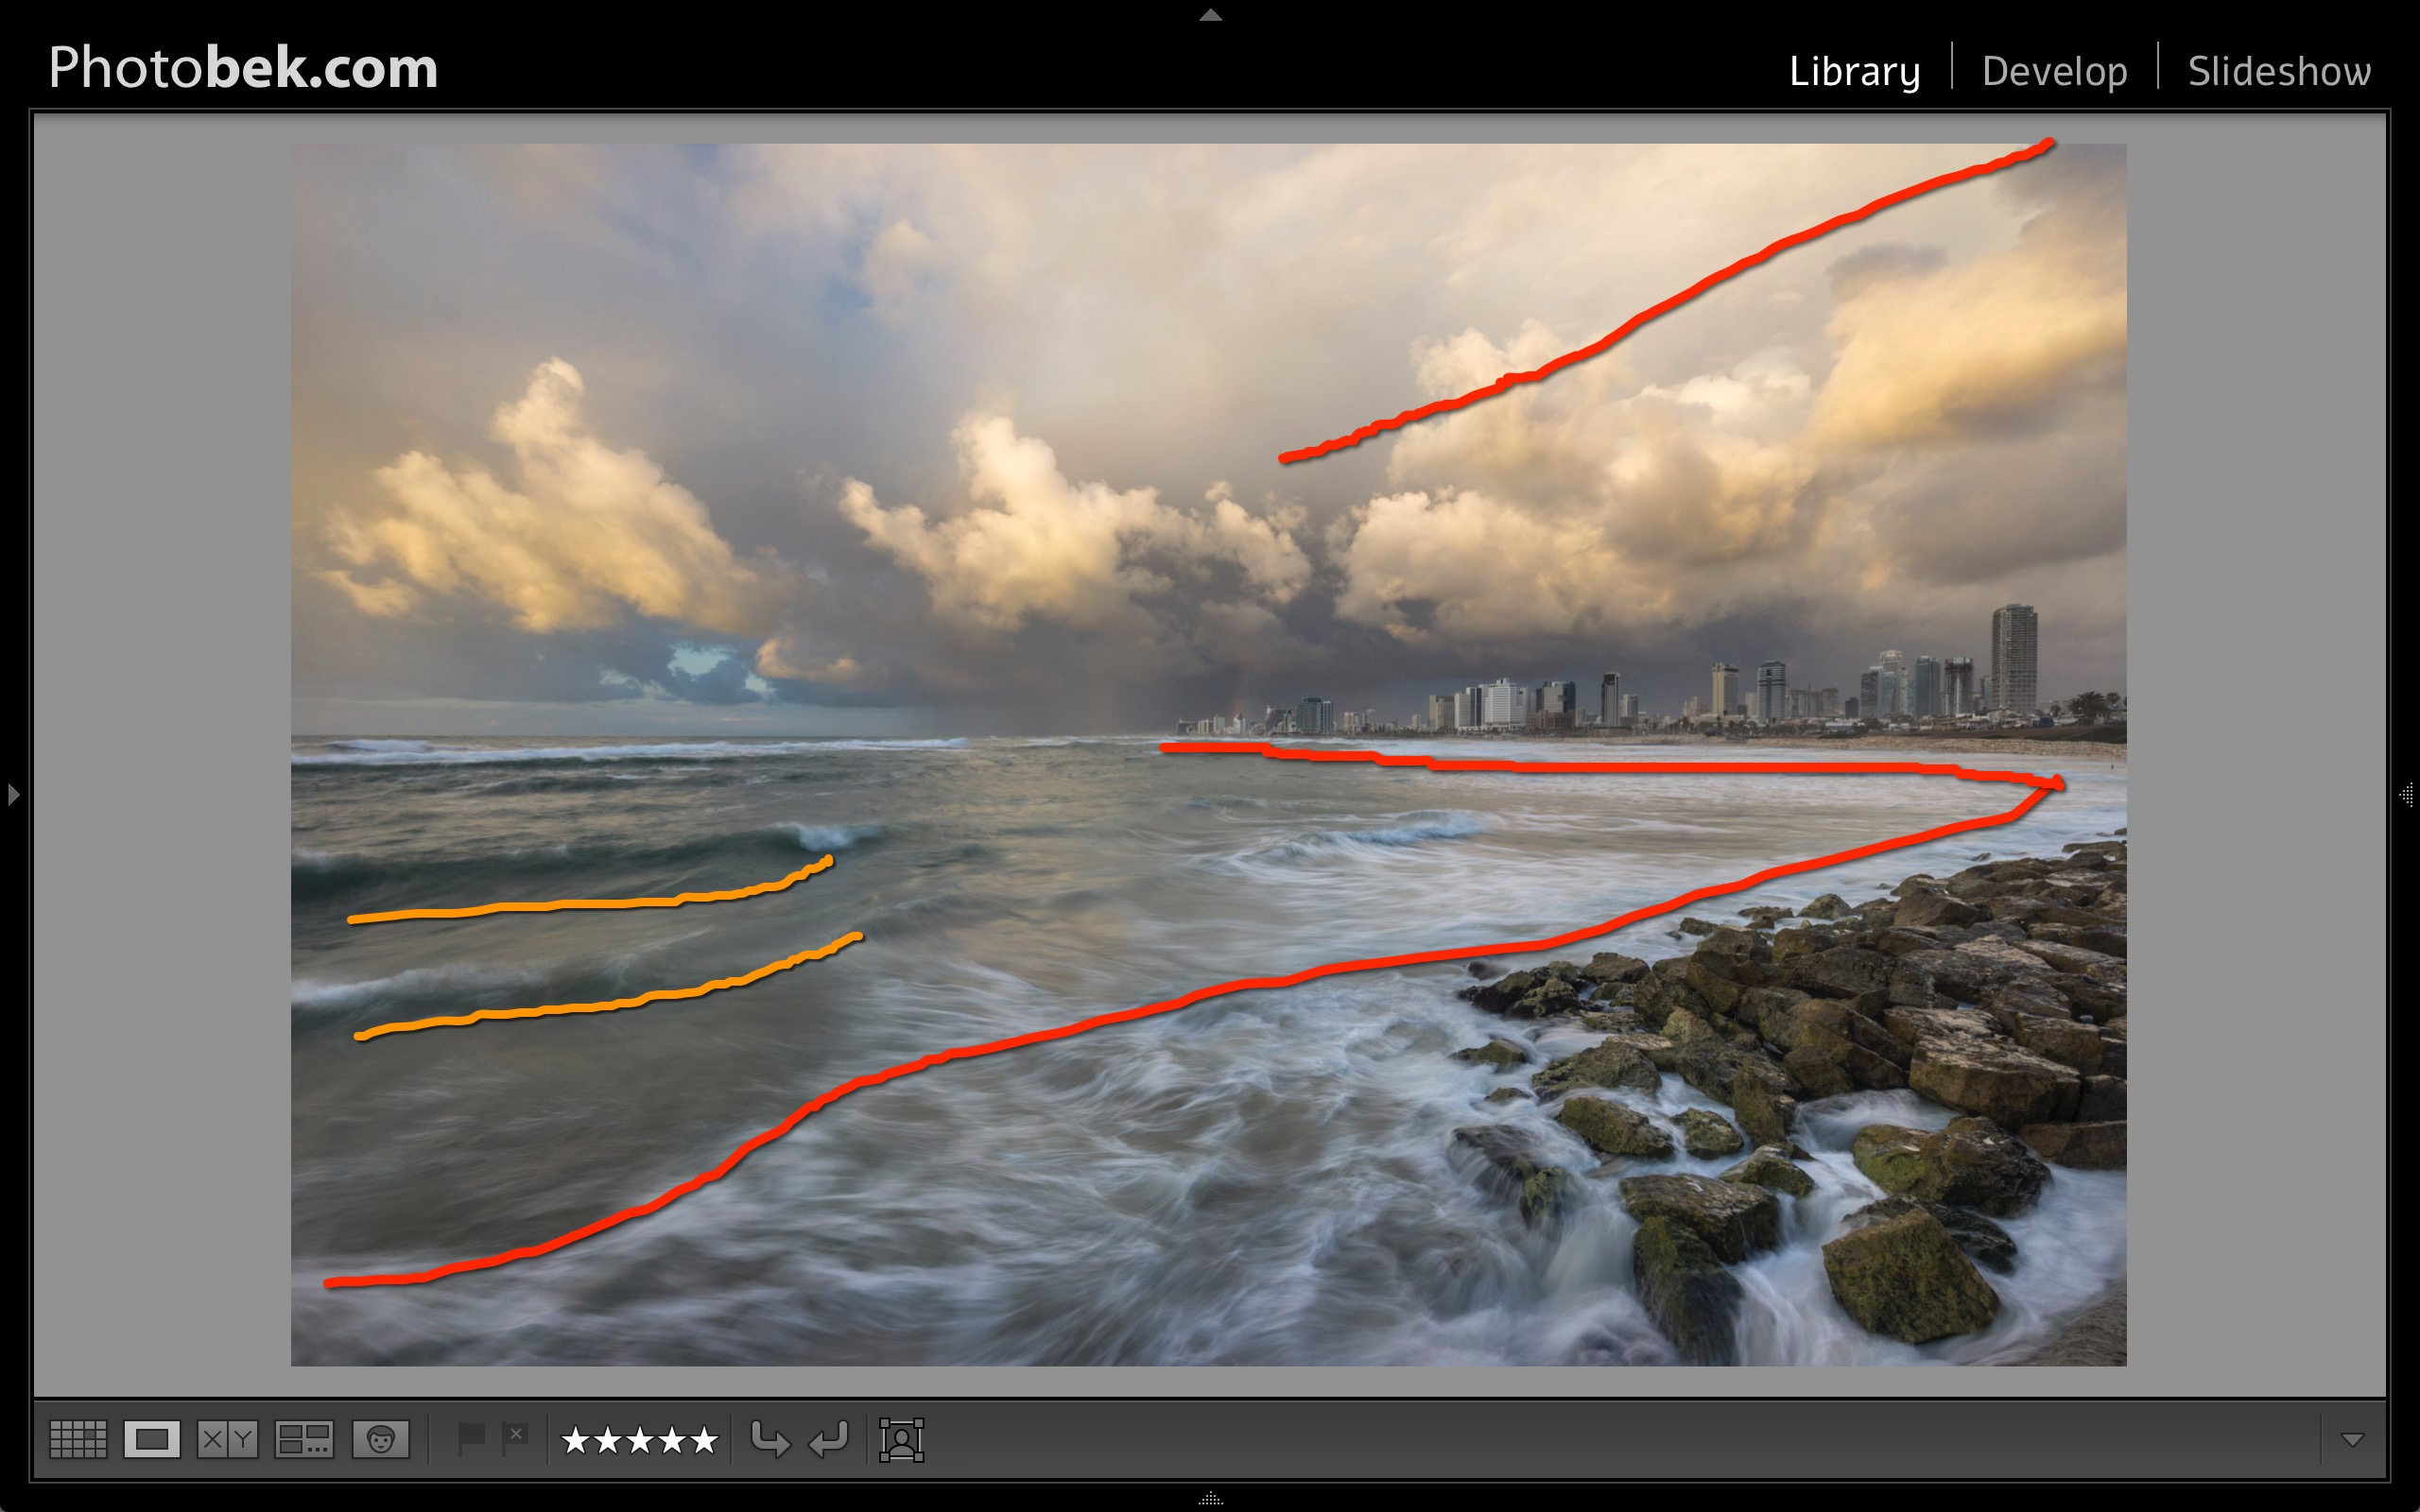
For this specific image, I wanted the white foam of the waves to create sort of a leading line that will guide the eye towards the city and the cloudscape above it. So that’s why I set the frame so that white foam starts at the bottom left corner and creates that “leading line” towards the rocks, the city, and eventually to the center of the clouds. Also, as you can see, the clouds create sort of a “leading line” from the top right corner down to the center of the image.
The waves also create additional smaller such “leading lines” to the left of the frame.
The Processing
Shooting is just 50% of the game, and post-processing takes the other 50%. I mostly use Lightroom for editing my images, and sometimes I also use Photoshop and Color Efex Pro 4 (by Nik Software). All editing was done in Lightroom for this image, and I’ll break it down into steps as I hope it will make it clearer.
Here are the images as they came out of the camera:
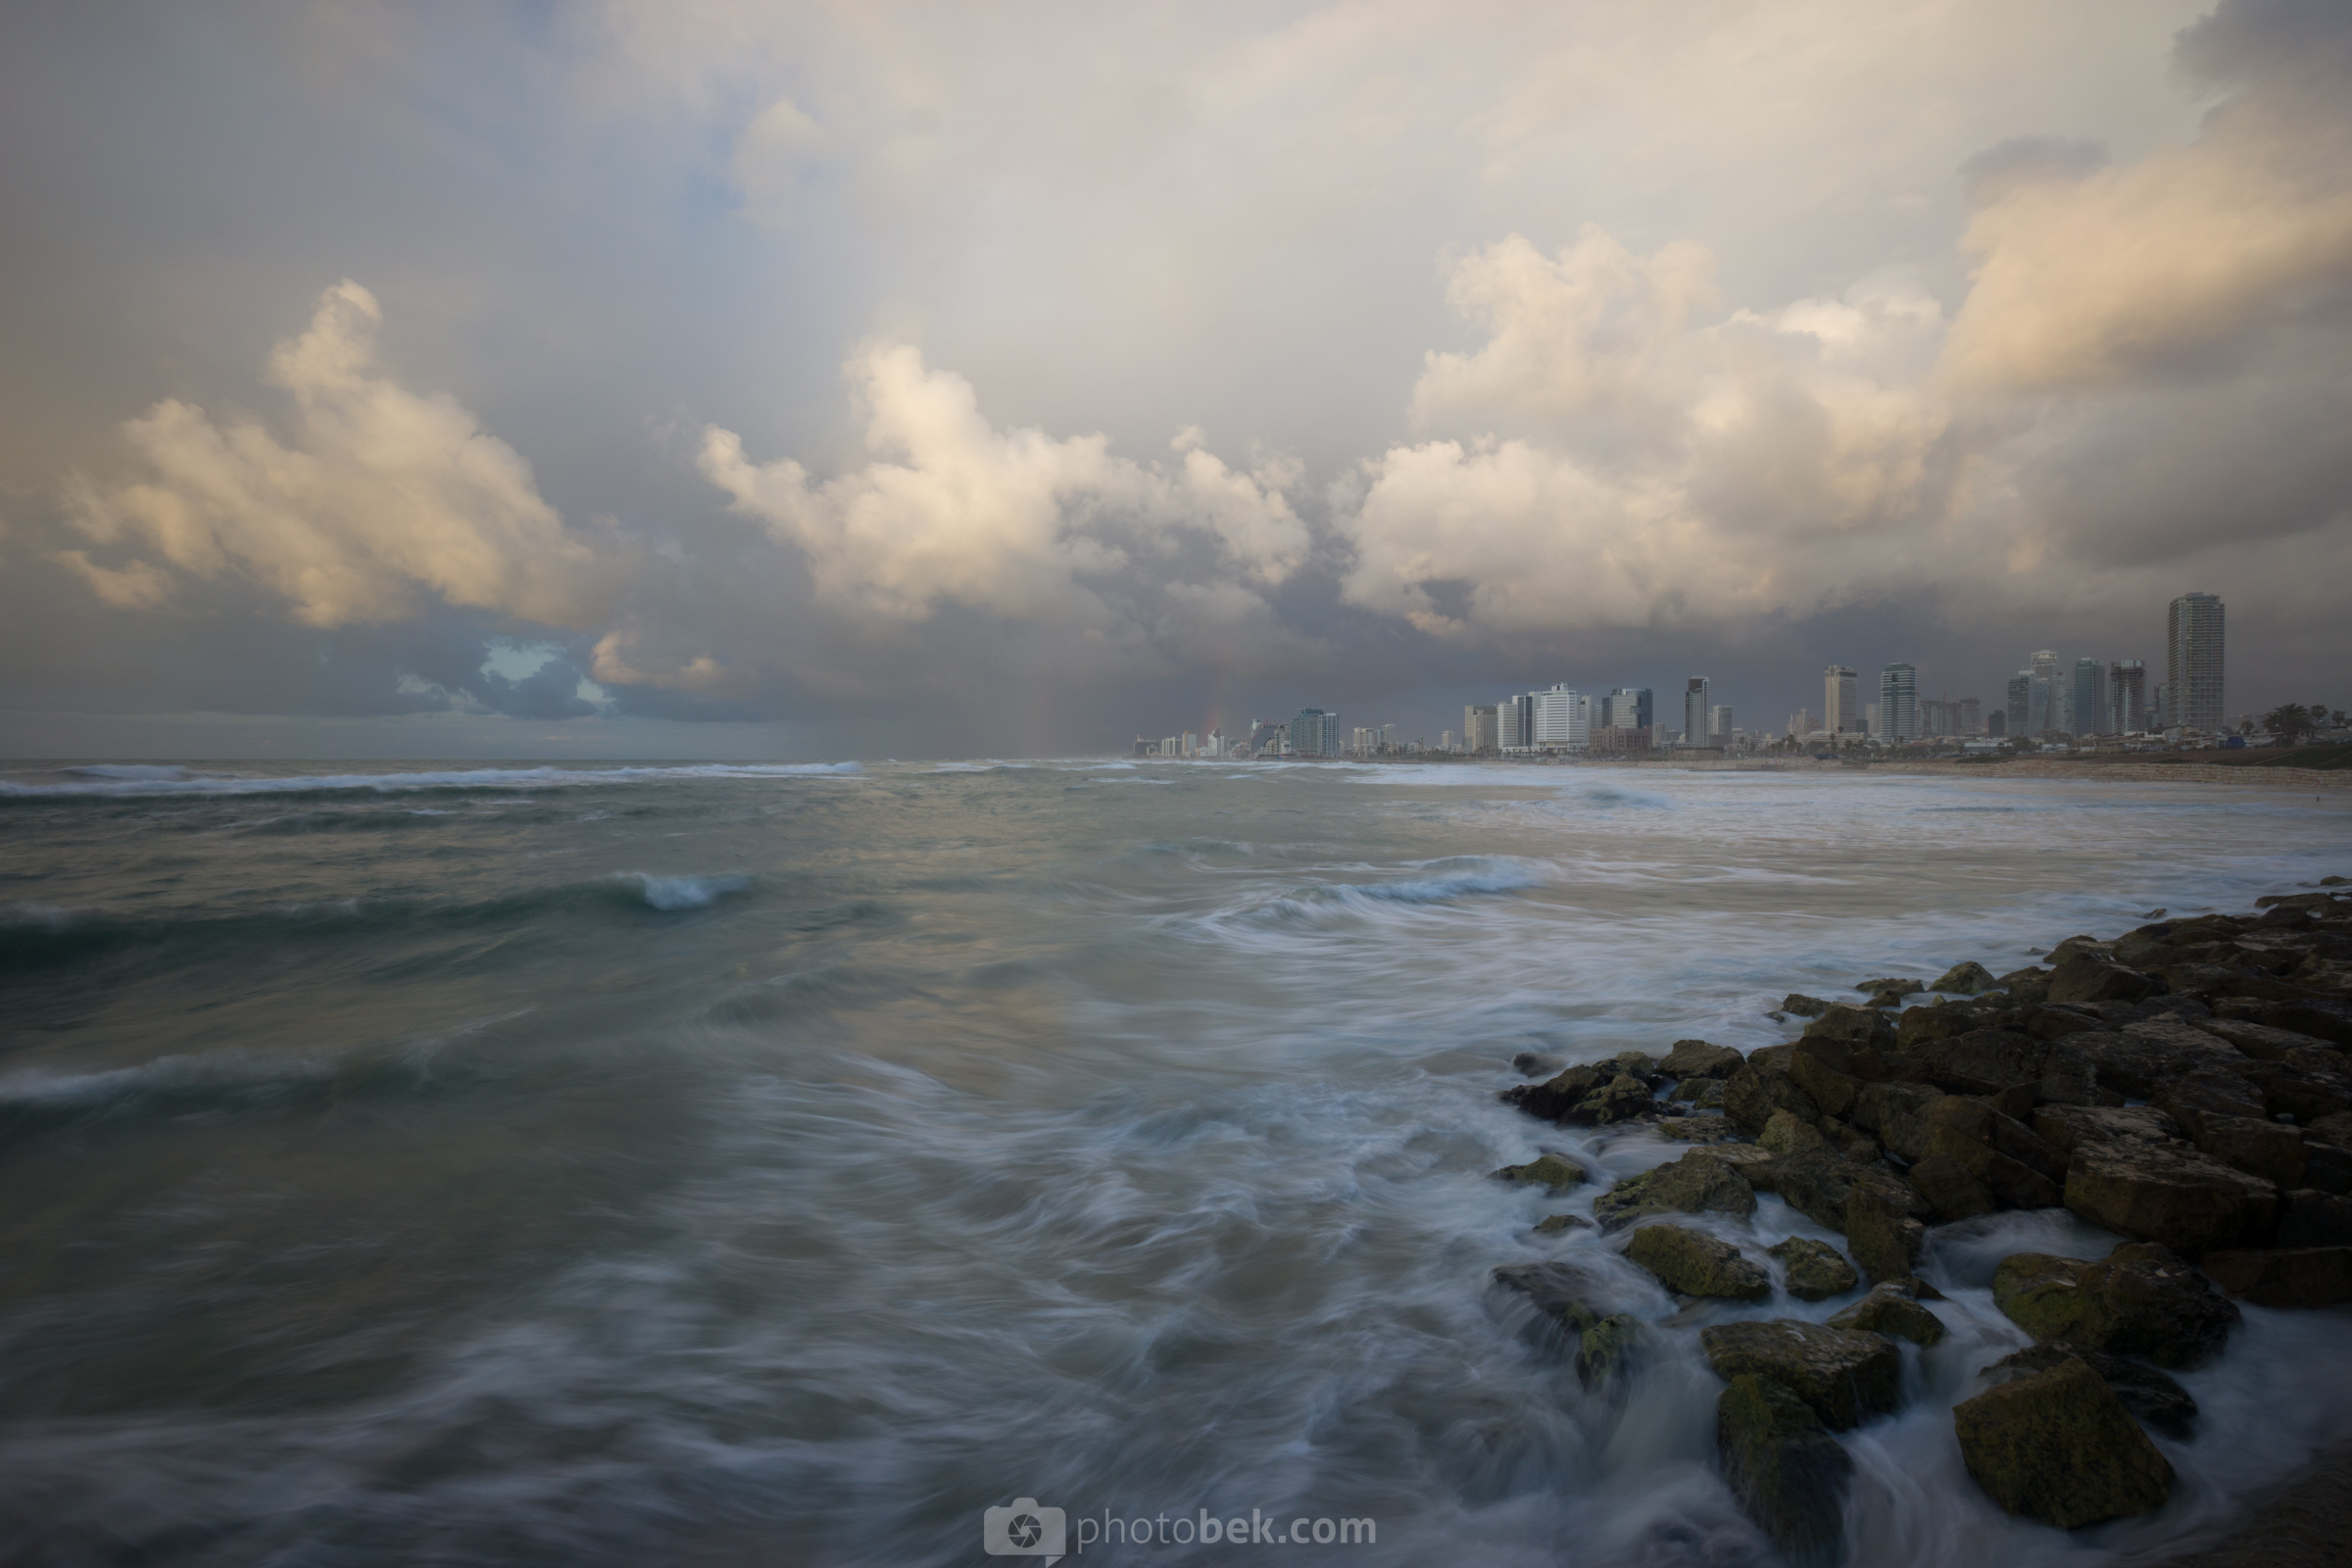
And now for the processing steps, I took:
- Lens Corrections – Enable profile corrections and remove chromatic abberation.
- Basic
- White Balance – I change to Auto and see what I like best. In this case Auto looked better than As Shot.
- Highlights – dropped to -100 as it makes the clouds “pop” and have much more definition.
- Shadows – increased to 56 to get more details from the rocks.
- Whites – Increased to 43 to get more brightness in the water foam and clouds.
- Blacks – Increased to 13 for better contrast overall.
- Clarity – Increased to 39 to get more detail definition and “drama” overall.
That’s all I did from the so-called “basic” stuff, and this is the result I got so far:

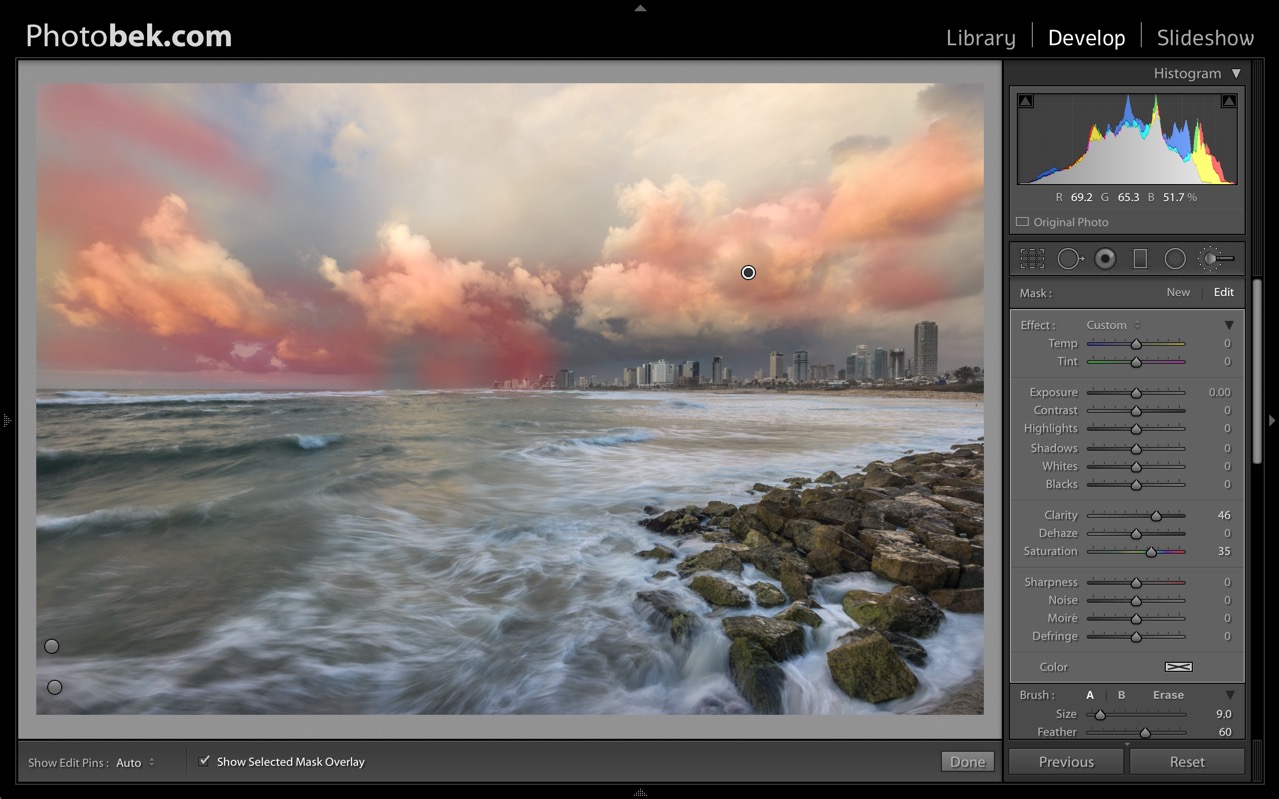
I still felt like something is missing, especially in the sky. It didn’t have the same color it had when I took the image. The sun gave a subtle gold color to the clouds, and I wanted to get that back, plus give it a sort of “punch” and accentuate the clouds and water more to add more “drama” to the image.
So I used a Graduated Filter on the sky:

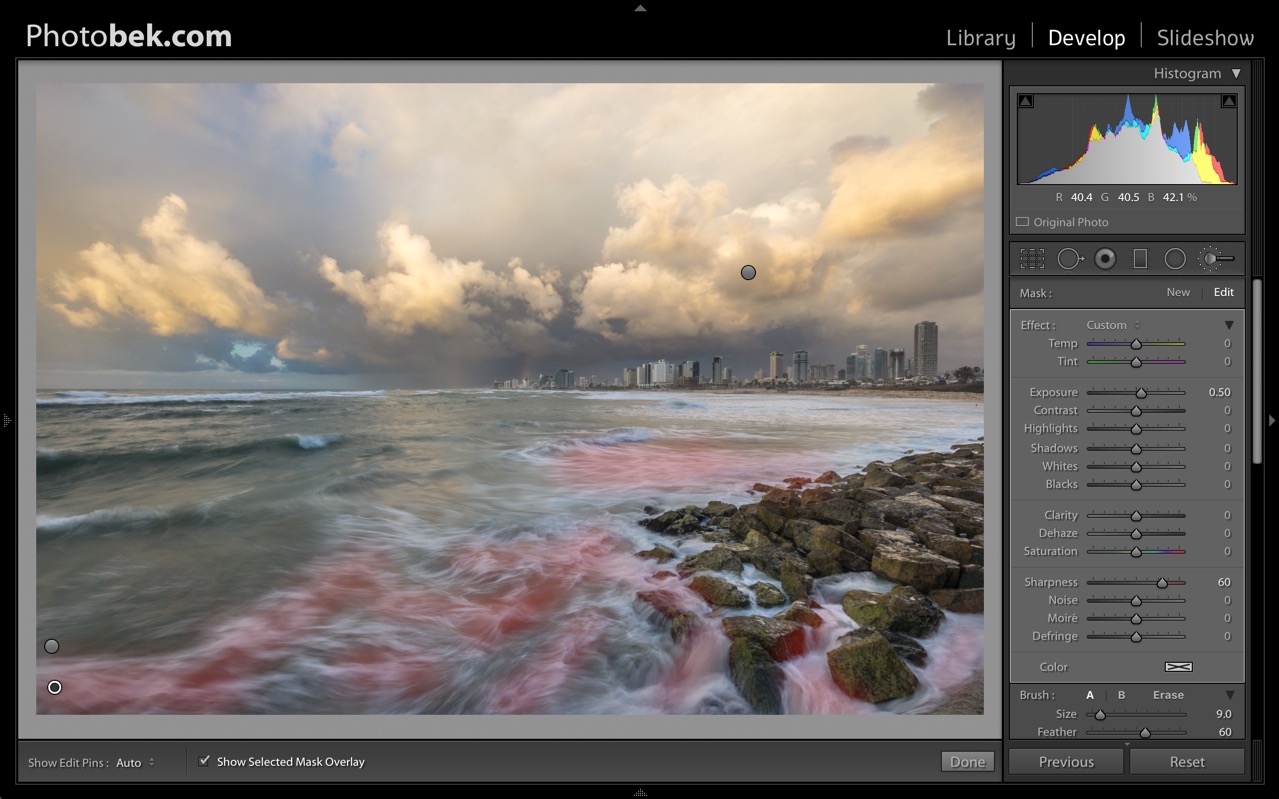
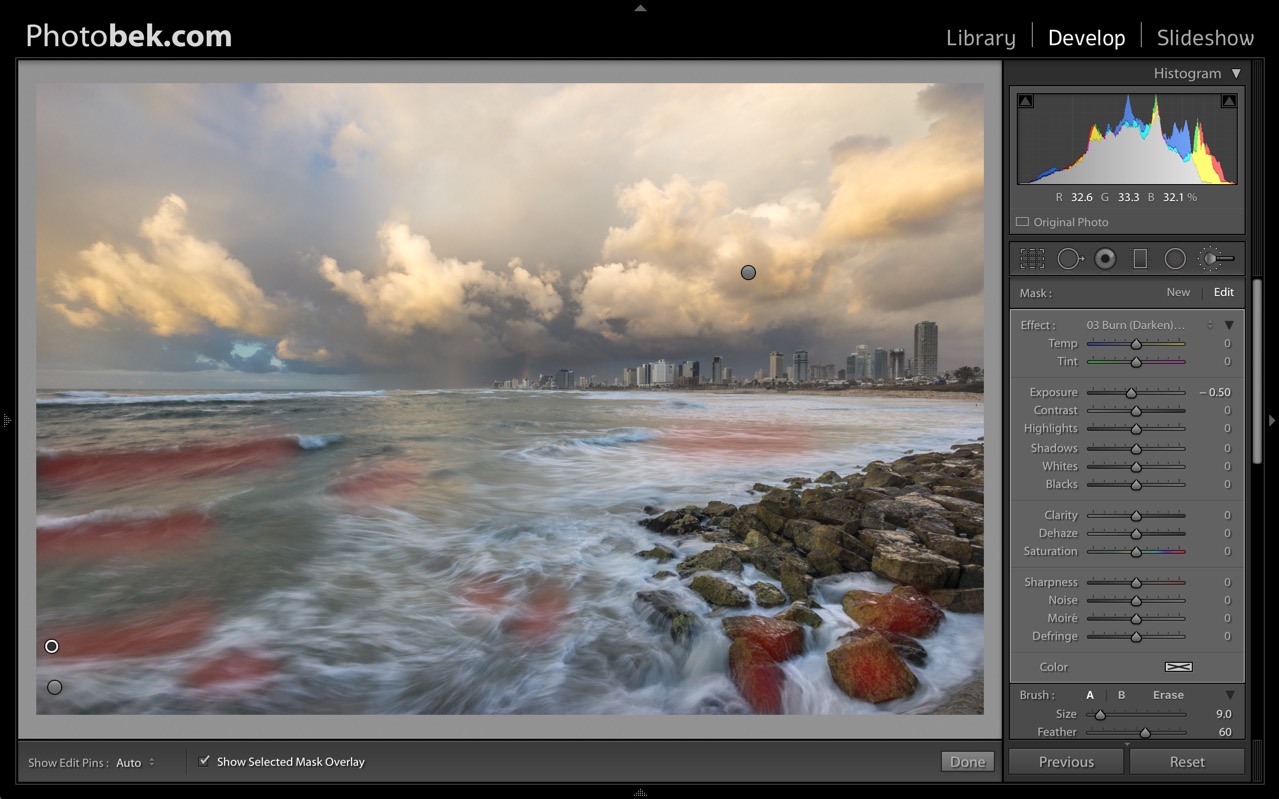
I did some dodge&burn on the waves in the foreground to add more definition to them and make the white foam more apparent using the Adjustment Brush.
And to finalize the shot, I added some saturation and clarity to the clouds.
And the final image…
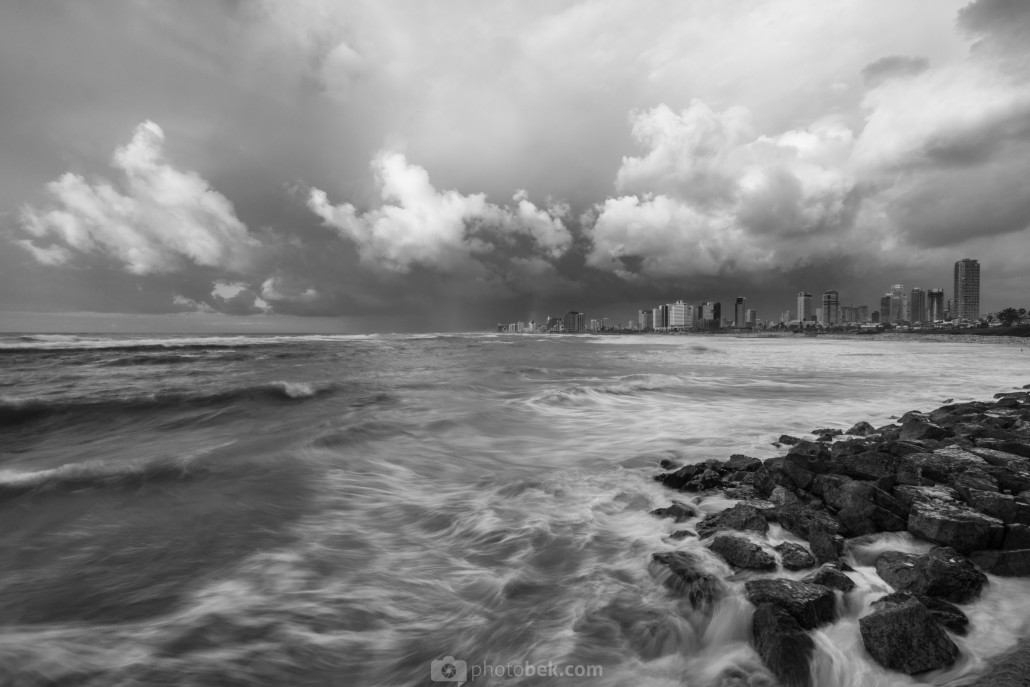
Well, here I had a bit of a problem. Usually, when I shoot this kind of image, with water and a great cloudscape, I find myself always going Black and White instead of color.
So I tried it here and turned the image into Black and White adding some more contrast to make it more dramatic, but I didn’t get the same feeling that I usually get when I go Black and White. I usually immediately feel like the image is better in Black and White.
This is time I didn’t.
I kept going back and form between the color and Black and White and couldn’t really decide. So I figured I post it up on FB to see what others think. I posted it on the Expert Photography group, and to be honest with you; I didn’t expect the number of responses I got 🙂
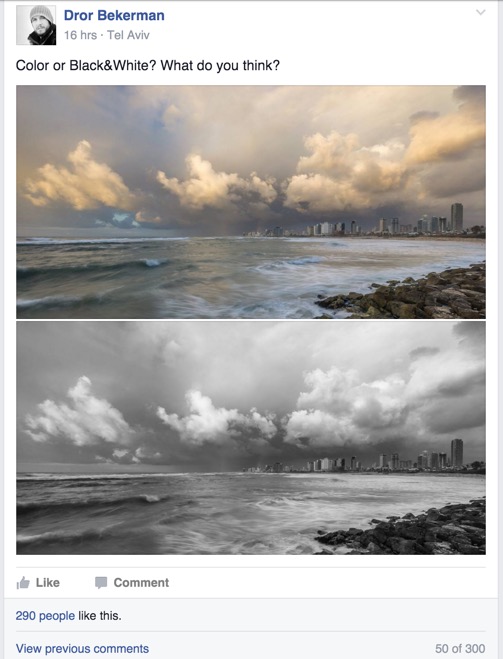
300 comments were way more than I thought I would get, and I want to thank everyone that took the time and shared his opinion with me.
After reviewing the comments, the color came out as the big winner (198 vs. 59), and it really grew on me as the better-looking image in this case.
Before I let you make your own choice of the camera, I just wanted to say that I was surprised no one mentioned the 2 rainbows in the image. They are pretty small, so I guess that is why but if you haven’t found them yet, here they are:
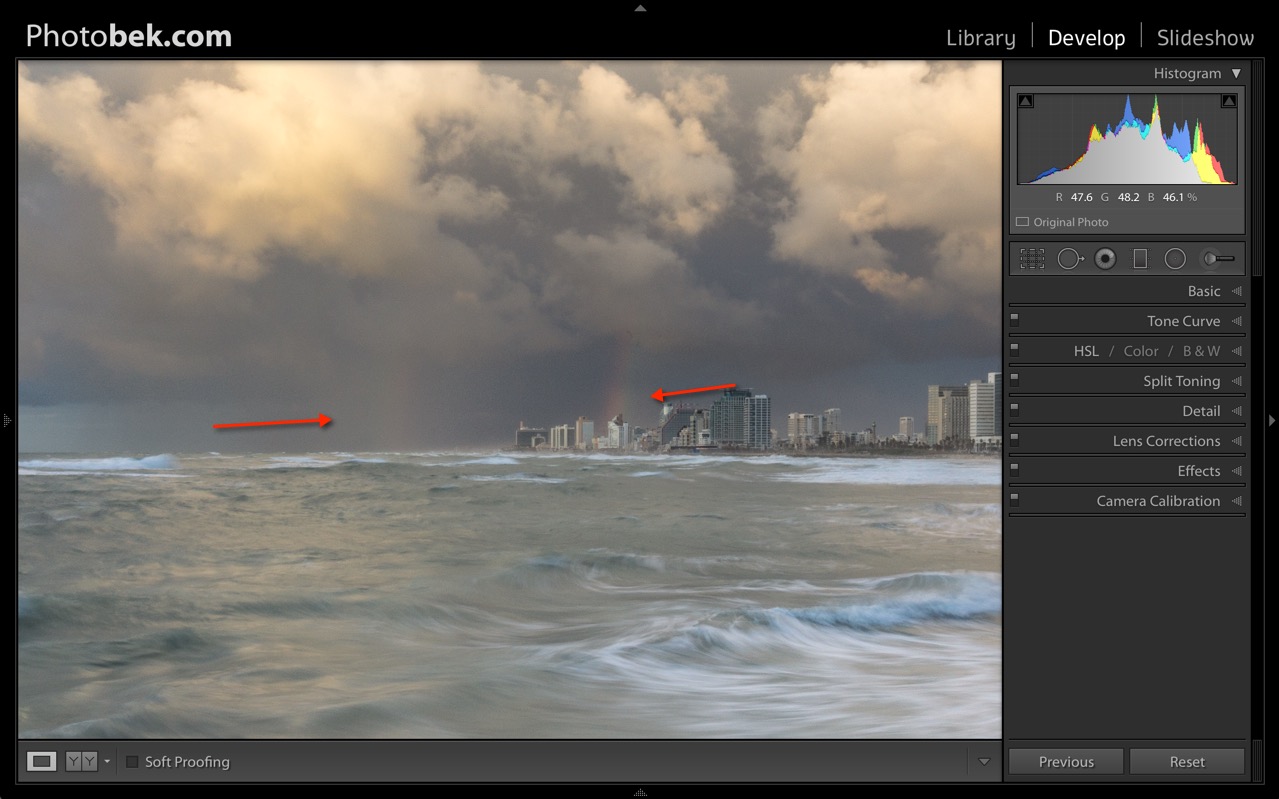
Now, what do you think? Color or B&W?
What Should You Take From This…
Here are some points that I think you should take from this “making of”:
It’s not about the camera
I took this shot with my great (and old) Sony NEX-7. I bought this camera almost 4 years ago, and the model will be 5 years old in August 2016. So it’s old, it isn’t a full-frame camera, but it doesn’t matter. You can take great photos with any camera because it’s not about the camera, so don’t let that stop you!
Be at the right place at the right time
I could have taken the same image on any of the other 364 days of the year, and the chances are that they won’t be as good as this one. I was at the right place at the right time to take the shot. I have a list of locations that I know I can get to in X amount of time if I see some good conditions building to increase my chances of capturing something truly great. Some might call it luck, but I believe that you make your own luck 😉
Shoot RAW
Suppose you aren’t shooting RAW already, then start today. Start today. You can’t get the information you want to get the image you want without working with RAW files.
Shoot Shoot Shoot
I shot 88 images during this photo session. I shot from different locations, different angles, different exposures, and I ended up with this one-shot. Just keep shooting. It doesn’t cost anything these days 🙂 I seriously doubt that anyone today is getting the perfect shot on the 1st click. Shoot as much as you can because you don’t know what will be the “winner.” Plenty of times, the image that I thought would be the “winner” and that I was most excited about post-processing turned out to be less than that, and a different image was the real “winner.”
The 80/20 Rule (Pareto Law)
As you can clearly see, the post-processing I did for this image is not complicated and was mainly only basic stuff that anyone can do, and it won’t take more than 5-10 minutes. I consider this to be the 20% that gives you 80% of the final result. Then, of course, I can sit for another hour (or hours) and go into Photoshop and post-process the sh** out of this image. Still, all that time will only bring me the remaining 20% of the final image, and to be honest, in most cases and especially when viewing the image on smartphones and computer screens, you won’t be able to tell the difference.
So stick to the 20% that gives you 80% of the results. At least when you’re only getting started 🙂
Anything Else?
Did I miss something? Please feel free to share your thoughts or questions in the comments below.
Thanks 🙂

Oh wow! Thank you so much! And I missed the rainbows too dang it! I am anxious to start shooting in RAW. I’ll be doing that as soon as I get a new computer. Your information is is clear and easy for beginners like Me to understand! Perfect picture and perfect follow up! Thanks for remembering to do this! Cheers!
Thank you for giving me the “nudge” I needed in order to sit and write this out 🙂
Hi there…..that is the most interesting, informative and understandable tutorial I’ve ever read. Thank you for your time to do this and most of all to share. Your work is incredible and stunning. Looking forward to see more……….and no, didn’t see the rainbows…..:-)
Happy shooting ?
With feedback like yours it will be very easy for me to write more “making of’s”. Thanks!